Web Application Procedures
This section provides additional procedures related to web application configuration.
If web application details are missing after the web application is created, for example, if a certificate is deleted from the Windows Certificate store after the web application is created, the certificate displays in red when you select the web application in the SMC tree. In this case you must edit and save the web application.
- At least one web application is available.
- In the SMC tree, select Websites > [website] > [web application].
- Click Edit
 .
.
- In the Web Application Details expander, edit the web application details as follows:
a. Click Browse to edit the web application user. The web application user must be a member of the IIS_IUSRS group. If you select a user that is not a member of the IIS_IUSRS group, the SMC prompts you to add that user to the IIS_IUSRS group.
b. Enter the Password of the web application user.
c. Click Browse and select a valid certificate using the Select Certificate dialog box. You can select a certificate from the Personal tab of the Store location; either Local machine certificates or User certificates.
NOTE: A CNG certificate with ECDSA signature algorithm is not supported.
- From the Project Information: Web Server Communication expander, select a Server project for linking to the web application.
NOTE 1: If the Web communication for the selected project is Disabled, it is recommended to cancel the web application creation and set the web configuration mode as Secured or Local. Otherwise, after creating a web application if you click the web application URL, you cannot connect with Web or Windows App clients.
NOTE 2: When you edit a project, the CCom port settings, including Communication mode and CCom port number, are updated to match the linked project's CCom port settings. Also, the system name and the project path of the linked project are displayed and selected by default. However, you cannot edit them.
NOTE 3: In a distributed environment, in addition to the linked system name (system name associated with the Server project linked to the web application), the system names of all the projects in distribution with the Server project linked to the web application are also displayed. When you launch the Web/WindowsApp clients, you can work with all the projects whose system names are listed.
- Click Save
 .
.
- A message displays, if you modify the web application certificate, indicating you that you need to sign the web application with the modified certificate using Sign Application
 .
.
- The web application parameters are modified.
- You have ensured that there is enough disk space for web application creation, else you must free some disk space. In Additional Installer Procedures, see Use Cleanup to Reduce Data Volume on the Hard Drive.
- At least one website is created and available under Websites in the SMC tree.
- The Server project folder is shared with the web application user. You can do this when you modify the server project using the Project Shares expander.
- (Only applicable for Server project in distribution) All the projects in distribution with the linked server project are shared with the web application user.
- In the SMC tree, select Websites > [website].
- Click Create Web Application
 .
.
- In the Server Information expander, do the following:
a. Type the full computer name of the Server, for example ABCXY022PC.dom01.company.net
or click Browse and select the server name using the Workstation Picker dialog box.
b. If required, edit the service port to match the service port number on the server. The default port number is 8888.
c. Click Projects to browse for and select a project on the configured Server using the Project Information dialog box.
- In the Project Information: Web Server Communication expander, the Server project name, the communication mode, and the CCom port number are configured according to the selected server project.
- The linked server project’s system name and the project path display.
- (Optional and not required when you have selected the server project using Projects) In the Project Information: Web Server Communication expander, click Browse to select a server project using Project Information dialog box.
- In the Project Information: Web Server Communication expander, the Server project name, the Communication mode, and the CCom port number are configured according to the selected server project. If the Communication mode of the selected server project is Local, then the web application, is also created with the Local mode. In this case, you cannot work with Windows App Client. Therefore, you have to manually edit the Communication mode of the server project to Secured and then Align with Server to update the Communication mode of the web application to Secured.
- The linked server project’s system name and the project path display.
- In the Web Application Details expander, proceed as follows:
a. Type a unique name for the web application.
b. Use the default path to store the web application files [installation drive:]\[installation folder]\[WebSites]\[Website name]. Otherwise, click Browse to modify the path.
c. Use the default self-signed certificate in the Certificate issued to field. Otherwise, click Browse to open the Select Certificate dialog box. Select a host/self-signed certificate from the Personal tab of the store location; Local machine certificates or User certificates. For more information, see Tips for Configuring a Web Application Certificate .
d. Use the default website user, or click Browse to select a user with the Select User dialog box. The web application user must be a member of the IIS_IUSRS group.
NOTE: For working with Windows App Client in distribution environment, the web application user must be added in the list of allowed users in the Project Shares expander of all the systems in the distribution with system (project) linked to the web application.
e. Type the password of the selected user.
- Click Save .
- A message displays.
- Click OK.
- A new web application node is created as child of the selected website under Websites in the SMC tree. A corresponding child node is created in IIS. A web application folder containing the ClickOnce folder is created at the path specified while creating the website.
The System use notification files are copied from [Installation Drive]:\[Installation Folder]\GMSMainProject\Data\SMC to
[Installation Drive]:\[GMSProjects\WebSites\[Web sites name]\[Web application name]\ClickOnce
[Installation Drive]:\[GMSProjects\WebSites\[Web site name]\[Web application name]\FlexClient folder
- A Copy URL button displays allowing you to copy the web application URL.
You can click the web application URL to launch the web page in the default browser for working with WindowsApp client.
 Hosted on Client/FEP")
Tips
- The host certificate's subject name configured for the CCom port settings on a server project must match the server name on the Client/FEP. Otherwise, a message displays informing you about the inconsistency and you cannot work with Windows App client.
- The root certificate (.cer file) of the host certificate or the self-signed certificate provided in the Host certificate field, in the Communication Security expander of the selected Server project, is available in the Trusted Root Certification Authorities (TRCA) store of the Local machine certificates store on the Server computer as well as on the Client/FEP machine hosting the web server (IIS).
- If the root certificate is missing on the Server during a web application creation/editing on remote web server (IIS), a message displays informing you that the host certificate is not valid. However, if the root certificate of the host certificate is not available in the TRCA on the Server, but is available in the TRCA on Client or FEP hosting the web server (IIS), the web application URL works.
- The web application can be different than the website user. You must ensure that the linked Server project is shared with the web application user on the remote web server (IIS) hosted on Client or FEP station.
- A CNG certificate with ECDSA signature algorithm is not supported.
In manual configuration mode, make sure that you enter the correct parameters to match with the selected Server project. This is because some details, for example the shared Server project path, may not be validated when you save the web application and then you cannot work with the Windows App client.
- You have ensured that there is enough disk space for web application creation, else you must free some disk space. In Additional Installer Procedures, see Use Cleanup to Reduce Data Volume on the Hard Drive.
- The project folder is shared with the web application user.
- The host certificate's subject name configured for the CCom port settings on a Server project is matching the server name on the Client/FEP. Additionally,
The root certificate (.cer file) of the host certificate or the self-signed certificate provided in the Host certificate field, in the Communication Security expander of the selected Server project, is available in the Trusted Root Certification Authorities (TRCA) store of the Local machine certificates store on the Server computer as well as on the remote web server (IIS) hosted on Client/FEP computer.
- (Only applicable for Server project in distribution) All the projects in distribution with the linked Server project are shared with the web application user. You have the details of the projects in distribution with the linked Server project, such as their system names, shared project path and so on.
- In the SMC tree, select Websites > [website].
- Click Create Web Application .
- In the Project Information: Web Server Communication expander, select the Manual configuration check box.
- The Service port becomes disabled and you cannot browse the server project.
- The CCom port and the Communication drop-down list become available.
- In the Server Information expander, do the following:
- In the Server name field, type the full computer name of the server, for example ABCXY022PC.dom01.company.net,
or click Browse to locate and select the server using the Workstation Picker dialog box.
- In the Project Information: Web Server Communication expander, do the following:
- Select the same Communication mode as that configured in the selected server project.
- Secured: (required when the web application is on the remote web server (IIS) hosted on a Client/FEP machine) Default selection, secures the communication with certificates between the CCom port and the remote web server (IIS).
- Local: (recommended on a stand-alone Server with local web server (IIS)) When selected, enables the communication between the CCom port and the local web server (IIS). The communication is enabled, but it is without certificates.
NOTE: If you select the communication mode as Disabled, no communication is possible between the CCom port and the web server (IIS).
- Type the CCom port number of the Server project.
- Click Add System to add a row, where you can manually type in the system name and the project path of the project that you want to connect to on the selected Server.
NOTE: For a distributed system, if the linked server project has other projects configured in distribution, all those projects’ system name and the shared project path are listed, must be first shared and then manually configured in the Project Information: Web Server Communication expander.
- In the Web Application Details expander, do the following:
- Type a unique name for the web application.
- Use the default path to store the web application files [installation drive:]\[installation folder]\[Websites]\[Website name]. Otherwise, click Browse to modify the path.
- Use the default self-signed certificate in the Certificate issued to field. Otherwise, click Browse to open the Select Certificate dialog box. Select a host/self-signed certificate from the Personal tab of the Store location; Local machine certificates or User certificates.
NOTE: A CNG certificate with ECDSA signature algorithm is not supported.
- Use the default website user or click Browse and select a user using the Select User dialog box. The web application user must be member of the IIS_IUSRS group.
NOTE: For working with Windows App Client in distribution environment, the web application user must be added in the list of allowed users in the Project Shares expander of all the systems in the distribution with system (project) linked to the web application.
- Enter the password of the selected user.
- Click Save .
- A new web application node is created as child of the selected website under Websites in the SMC tree. A corresponding child node is created in IIS. A web application folder containing the ClickOnce folder is created at the path specified while creating the website.
The System use notification files are copied from [Installation Drive]:\[Installation Folder]\GMSMainProject\Data\SMC\ to
GMSProjects\WebSites\<Website>\<WebApp>\[ClickOnce folder]
GMSProjects\WebSites\<Website>\<WebApp>\[FlexClient folder]
- A Copy URL button displays allowing you to copy the web application URL.
You can click the web application URL to launch the web page in the default browser for working with WindowsApp clients.
If the web application details are missing after the web application is created, for example, if a certificate is deleted from the Windows Certificate store after creating the web application, the certificate displays in red when you select the web application in the SMC tree. In this case you must edit and save the web application.
- At least one web application is available under Websites > [website] in the SMC tree.
- The server project folder is shared with the web application user.
- (Only applicable for Server project in distribution) All the projects in distribution with the linked server project are shared with the web application user. You have the details of the projects in distribution with the linked Server project, such as their system names, shared project path and so on.
- The host certificate's Subject name configured for the CCom port settings on a Server project is matching the Server name on the Client/FEP. Additionally,
- The root certificate (.cer file) of the host certificate or the self-signed certificate provided in the Host certificate field, in the Communication Security expander of the selected Server project, is available in the Trusted Root Certification Authorities (TRCA) store of the Local machine certificates store on the Server computer as well as on the remote web server (IIS) hosted on Client/FEP computer.
- In the SMC tree, select Websites > [website] > [web application].
- Click Edit .
- In the Server Information expander, do the following:
- Type the full computer name of the server or click Browse to select the server name in the Workstation Picker dialog box.
- (Only in Automatic mode) If required, edit the service port to match the service port number on the Server. The default port number is 8888.
- (Only in Automatic mode) Edit the project from which you want to obtain the information by clicking Projects and selecting a server project using the Project Information dialog box. Outdated projects are not available for selection.
- In the Project Information: Web Server Communication expander, proceed as follows:
a. In Automatic mode, the System name and the shared Project Path fields are automatically filled in if the selected server project is shared. Also, the system name of the project linked to the web application is selected by default and indicated as linked system. The Communication mode and the CCom port are automatically configured according to the Server project selected. If the Communication mode of the selected server project is Local, then the web application, is also created with the Local mode. In this case, you cannot work with the Windows App Client. Therefore, you have to manually edit the Communication mode of the server project to Secured and then Align with Server to update the Communication mode of the web application to Secured.
b. (To edit the web application in Manual mode) Select the Manual check box. In Manual mode, do the following:
- Edit the communication mode to match the Web communication mode of the selected server project.
- Edit the CCom port to match the selected server project.
- Edit the system name and the project path by typing the shared project path for the edited server project that you want to connect to on the selected server.
NOTE: For a distributed system, if the linked Server project has other projects configured in distribution, all those project’s System name and the shared project path are listed, provided they are shared, in case of automatic mode. In manual mode, the projects must be shared and manually configured in the Project Information: Web Server Communication expander.
- In the Web Application Details expander, do the following:
a. Click Browse and select a web application user. The user can be a local Windows user or a domain user.
b. Enter the password for the web application user.
c. Click Browse.
d. In the Select Certificate dialog box in the Certificate issued to field, select a valid certificate. Select a host/self-signed certificate from the Personal tab of the store location; either Local machine certificates or User certificates.
NOTE 1: A CNG certificate with ECDSA signature algorithm is not supported.
NOTE 2: If you modify the web application certificate, you must sign the web application using Sign Application.
- Click Save .
- The web application is modified.
- You have modified the website parameters (such as HTTP/HTTPs port numbers, Host name) or you have modified the web application certificate.
- In the SMC tree, select Websites > [website] > [web application].
- Click Sign Application .
- A confirmation message displays.
- Click OK.
- The selected web application is signed with the parent website.
- You have a web application with the status
Outdated(in red).
- In the SMC tree, select Websites > [website] > [web application].
- Click Upgrade
 .
.
NOTE: If any of the parameters are changed, for example, user password or certificate, you must edit the web application, save it and upgrade it again.
- A confirmation message displays.
- Click OK.
- The selected web application is upgraded.
- Upon upgrade, the System use notification files are copied from [Installation Drive]:\[Installation Folder]\GMSMainProject\Data\SMC\ to
GMSProjects\WebSites\<Website>\<WebApp>\[ClickOnce folder]
GMSProjects\WebSites\<Website>\<WebApp>\[FlexClient folder]
You must align the web application on the remote web server with the modified project data.
- At least one web application is available under a website.
- In the SMC tree, select Websites > [website] > [web application].
- Click Delete
 .
.
- A confirmation message displays.
- Click OK.
- The selected web application is deleted.
- You have edited the StartSmc.bat file under [installation drive:]\[installation folder]\GMSMainProject\bin and added the /support switch.
- You have relaunched SMC.
- In the SMC tree, select the Websites > [website] > [web application].
- Click Check Consistency
 .
.
- The system internally checks the website, web application, and project parameters and displays a message asking if you want to open the log file now.
- Click Yes.
- A log file opens in the default editor. The log file is also saved under
[installation drive:]/[installation folder]\GMSMainProject\log in the format [web application name]_[DD MM YYYY]_[HHMMSS].
You must then re-align a web application on the remote Web server (IIS) hosted on the Client/FEP station with the modified Server project linked to the web application.
- You have modified the Server project parameters (such as CCom port number or the communication mode) linked to a web application.
- In the SMC tree, select Websites > [website] > [web application].
- Click Edit .
- Click Align with Server
 .
.
- Click Save .
- You want to install the certificates in the Trusted Root Certification Authorities Windows Certificate store using the Certificate dialog box.
- In the Certificate dialog box, click Install Certificate.
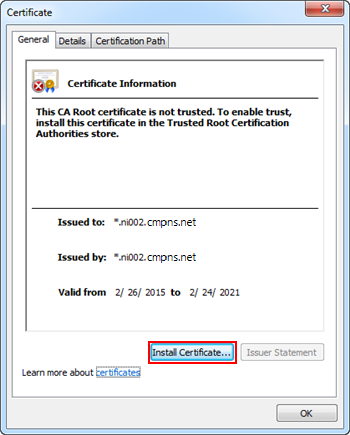
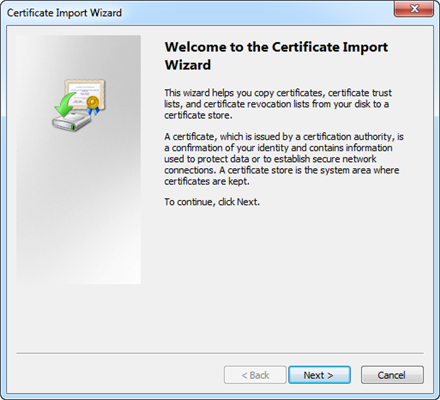
- The Certificate Import Wizard dialog box displays.
- In the Certificate Import Wizard, click Next.
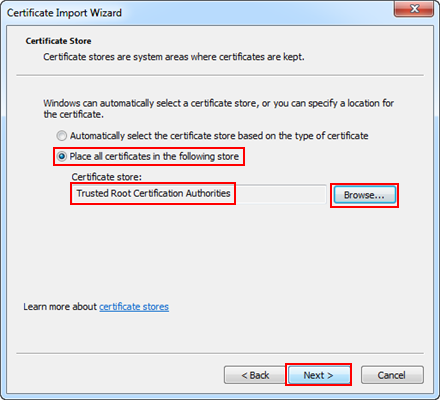
- Select the Place all certificates in the following store option, and browse to and select Trusted Root Certification Authorities certificate store.
NOTE: When installing certificates on the Windows 10 operating system, you must select the Windows store from where you want to import the certificate. For example, User Store.
- Click Next.
- Click Finish.
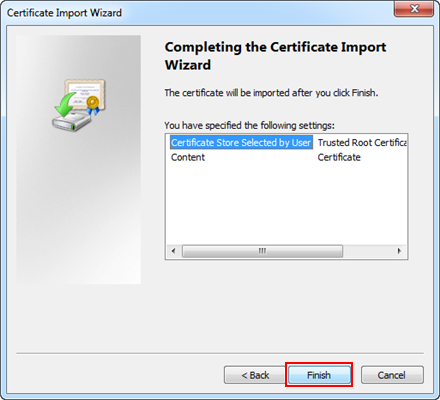
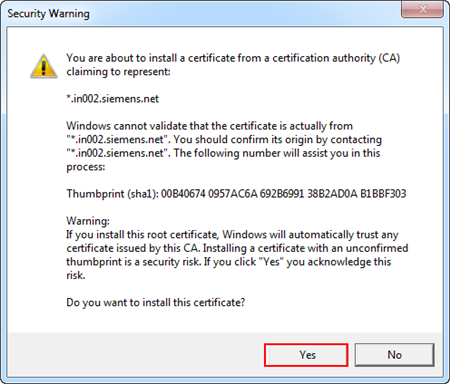
- When the Security Warning message displays, click Yes to install the certificate.
- Click OK to acknowledge the successful import.
- In the Desigo CC web page, click the Desigo CC tab, and then click the Windows App Client thumbnail for launching the Windows App Client.
The installation of Desigo CC starts. When completed, the logon dialog box displays.
- Enter your username and password.
- Select the domain.
- Click Logon.
- You want to install the certificates in the Trusted Publisher Windows Certificate store using the Certificate dialog box.
- In the Certificate dialog box, click Install Certificate.
- The Certificate Import Wizard dialog box displays.
- In the Certificate Import Wizard, click Next.
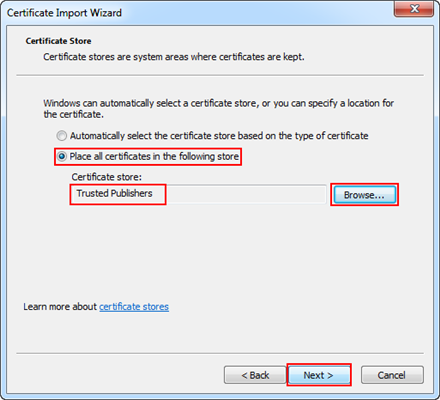
- Select the Place all certificates in the following store option, and browse to and select Trusted Publisher Certificate store.
NOTE: When installing certificates on the Windows 10 operating system, you must select the Windows store from where you want to import the certificate. For example, User Store.
- Click Next.
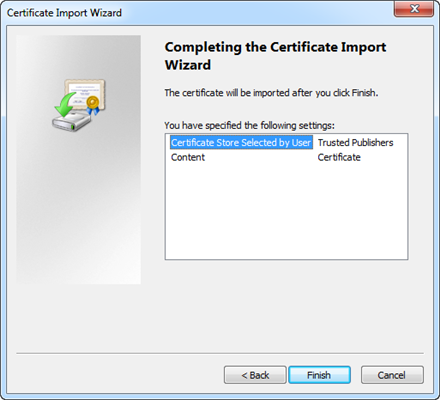
- Click Finish.
- Click OK to close the Certificate dialog box after the successful import.
- In the Desigo CC web page, click the Desigo CC tab, and then click the Windows App Client thumbnail for launching the Windows App Client.
The installation of Desigo CC starts. When completed, the logon dialog box displays.
- Enter your username and password.
- Select the domain.
- Click Logon.
Perform the following steps only when you want to run the Windows App client on IPv6 network enabled systems.
Configuring the Web Server to Run on the Dual-Stack (IPv4 and IPv6) Network
You must configure the web server for running on the dual-stack (both IPv4 and IPv6) network. To do this, perform the following steps:
- You are on the web server system.
- From the Windows Start menu, select Control Panel.
- Double-click Network and Sharing Center and click Local Area Connection.
- When the Local Area Connection Status window displays, click Properties.
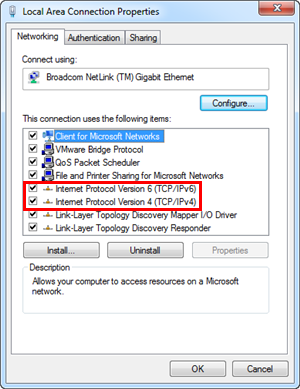
- In the Local Area Connection Properties window, select the following check boxes:
- Internet Protocol Version 6 (TCP/IPv6)
- Internet Protocol Version 4 (TCP/IPv4)
- Click OK.
- Click Close.
- Restart the web server system.
- The web server now runs in dual-stack network.
- (Optional) To verify the system is running in dual-stack (both IPv6 and IPv4) network, at the command prompt, type IPconfig -all.
- The command displays both the IP addresses—IPv4 and IPv—of the web server.
Confirming the System as an IPv6 Network Enabled System
- You have a system with an IPv6 network where you want to run Windows App Client.
- Go to the command prompt.
- At the command prompt, type ipconfig -all.
- The command prompt displays only the IPv6 address of the system.
Obtaining the IP Address of the Web Server
- You have a system with an IPv6 network on which you want to run Windows App Client.
- At the command prompt, type ping [Web server name] -t.
- The command prompt displays the IP address and full name of the web server system in the IPv6 address format.
Scenario: You want to install and set up a Desigo CC system in a stand-alone configuration with a remote web server segregated in a DMZ network.
Server and a Remote Web Server (IIS) in a DMZ Network
A DMZ (demilitarized zone) refers to an area of a network, usually between two firewalls, where users from the Internet are permitted limited access over a defined set of network ports and to pre-defined servers or hosts. A DMZ is used as a boundary between the Internet and your company's internal network. The network DMZ is the only place on a corporate network where Internet users and internal users are allowed at the same time.
In a DMZ setup, the web server (IIS) and the Desigo CC server are hosted on separate machines that are on different networks, separated by firewalls.
In such a scenario, commercial SSL certificates are typically used for the web site on IIS. For verifying the signature of the Windows App client, the same certificate or a separate commercial or self-signed certificate, may be used. However, you can use the same certificate if the private key used to secure the web site is exportable.
The following section describes a typical deployment scenario for setting up a Desigo CC system with a remote web server (IIS) in a DMZ scenario.
Server Station
A single dedicated station with the following features:
- Desigo CC server is installed.
- Microsoft SQL is installed on the Desigo CC server.
- The server project folder is shared.
- The required certificates are imported in the Windows Certificate store:
- The root certificate is imported in the Trusted Root Certification Authorities store.
- The host certificate is imported in the Personal store.
- The host certificate used must have a private key; no private key is needed for a root certificate.
Remote Web Server (IIS) Station in a DMZ
- A dedicated station serving as web server for hosting the web site/application. To simplify the web site configuration, it is recommended that you install the Desigo CC client or FEP software on this machine.
- The web application user on the remote web server has access rights on the shared project folder on the server.
- The required certificates are imported in the Windows Certificate store:
- The root certificate of the host certificate provided for CCom port security is imported in the Trusted Root Certification Authorities store.
- The communication between the web server and the Windows App client is always secured. Therefore, creating the web site and the web application certificates are mandatory. Desigo CC supports using either the same or different certificates for the web site and the web application. This section describes how to configure the web server to use the same certificate for both the web site and the web application.
- The certificate and its private key must be imported into the Windows certificate store (in the Local Machine\Personal store; its root certificate must be imported in the Local Machine\Trusted Root Certification Authorities (TRCA) store). The private key must be marked to be exportable.
- If different commercial certificates are used for creating the web site and web application, then both must be present in the Trusted Root Certification Authorities store and the Personal store of the Windows Certificate store.
Security
- Secure server/remote web server (IIS) deployments require high security configuration setup.
Deployment Diagram

Complete the following procedures in the specified order.
Setting up the Server Station
- From the distribution media, install the setup type as Server.
- Launch SMC.
- In the Console tree, select Certificates and do the following:
- Click Create Certificate
 and then select Create ROOT Certificate (.pfx) .
- In the Root Certificate Information expander, enter the details for the: Certificate file name for (.pfx) and (.cer), along with their password, and path on the disk. By default, the Subject name field is set to GMS Root Certificate.
- Click Save .
- A root certificate (.pfx and .cer files) is created and stored at the configured path.
- Click Create Certificate and then select Create Host Certificate (.pfx) .
- In the Host Certificate Information expander, enter the details for the: Root certificate along with its Password, Certificate file name (.pfx) and its Password, Certificate file name (.cer), the Path on the disk, and so on.
By default, the Subject name field displays the full computer name of the server (including the domain name if the server machine is in a domain). For example, ABCXY022PC.dom01.company.net.
- Click Save .
- A host certificate (.pfx and .cer files) for the server using the server root certificate is created at the configured path.
- Click Import and do the following:
a. In the Import Certificate expander, click Browse to select the root .cer file of the root certificate.
b. Select Set as default.
- Click Save .
- The root certificate is imported in the Trusted Root Certification Authorities store of the Windows Certificate store.
- Click Import and do the following:
a. In the Import Certificate expander, click Browse to select the host .pfx file of the host certificate for the Server.
b. Provide the password for the host certificate.
c. Select Set as default.
d. Select Key is exportable.
- Click Save .
- The host certificate is imported in the Personal store of the Windows Certificate store.
- In the Console tree, select Projects.
- Do one of the following:
- Click Restore Project Template
 to restore a project template on the server.
- Click Create Project to create a new project.
NOTE: If you have a project backup, you can restore it using the Restore Project icon. However, before restoring a project make sure that all the extension modules included in the project backup are installed on your system. Otherwise, a warning message will display.
- In the expanders that display, fill in the required details such as project name, user credentials, and HDB for the new project.
NOTE: If HDB is already linked to another project, a confirmation message displays when you save the project.
- Click Save Project .
- A confirmation message displays.
- Click OK.
- The selected project template is restored (or a new project is created) and a new node is created and selected in the Console tree.
- (Only applicable in case of restored projects and the project status is Outdated-check on upgrade) Click Upgrade .
- A confirmation message displays.
- Click OK.
- The project is upgraded to the current schema version.
- Click Edit .
- In the Security expander for the CCom Port Settings section, set the Web communication field to Secured. Ensure that Client/Server communication mode is Stand-alone.
- The Host certificate field displays the default set host certificate.
- Click Save Project .
- A message displays indicating that you must edit, align with the server and save the web applications client/FEP linked to this project.
- Click OK.
- A project is saved with Client/Server communication as Stand-alone and Web communication as Secured.
- If this is the first project, it becomes active automatically.
- Click Start Project
 to start the project.
- To work with a remote web server (IIS) in a DMZ scenario, you must share the server project folder with the web application user.

Setting up a Remote Web Server (IIS) Station in a DMZ Scenario
- On the remote web server (IIS) station in DMZ, ensure the following is done:
— The web application user has rights on the shared project folder and on the individual folders within the project (devices, graphics, libraries, profiles, and shared) on the server.
— The same root certificate (.cer file) of the CCom host certificate as on the Server are available on the web server (IIS).
- IIS is installed and you have removed the default web site from IIS.
- Using the distribution media, install the setup type —Client or FEP.
- Launch SMC.
- In the SMC tree, select the Certificates node.
- Click Import .
a. In the Import Certificate expander, click Browse and select the root .cer file of the server root certificate.
b. Select Set as default.
- Click Save .
- The root certificate is imported in the Trusted Root Certification Authorities store of the Windows Certificate store on the client/FEP station.
- Click Create Certificate and Create Self-Signed Certificate (.pfx) .
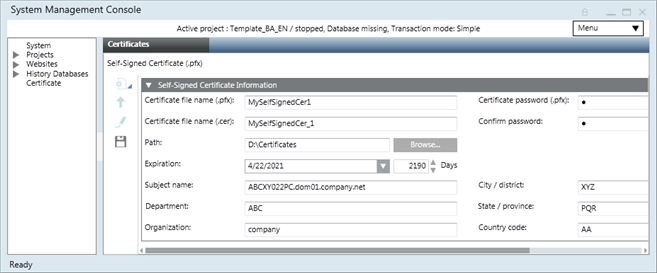
- In the Self-Signed Certificate Information expander, enter the details into the following fields: Certificate file name (.pfx) and (.cer) and the Password, and Path.
By default, the Subject name field displays the full computer name of the host machine (including domain name if the server machine is in a domain). For example, ABCXY022PC.dom01.company.net.
- Click Save .
- A self-signed certificate (.pfx and .cer files) is created at the specified location.
- Click Import :
a. In the Import Certificate expander, click Browse and select the .pfx file of the self-signed certificate.
b. Select Set as default.
c. Select Key is exportable.
- Click Save .
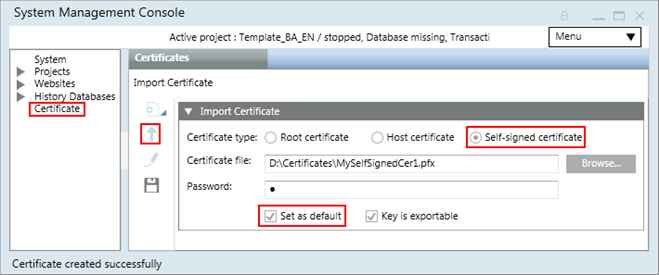
- The self-signed certificate is imported in the Trusted Root Certification Authorities store and the Personal store of the Windows Certificate store.
- In the SMC tree, select Websites node.
- Click Create Web site .
- The Details expander displays with pre-populated information for the: Name, Path, Host name, and Ports fields. Ensure that the ports are not in use. The Certificate issued to field displays the default set self-signed certificate. This web site certificate is used for secure communication over the HTTPs port. In addition, provide the following Web site details:
a. Browse and select a web site user. This user must be a member of the IIS_IUSRS group. Otherwise, a message displays asking you to add the selected user to the IIS_IUSRS group or select another user from the IIS_IUSRS group.
b. Provide the valid Password of the selected user.
- Click Save .
- A confirmation message displays.
- Click OK.
- The new web site node is created as a child under the Websites node. It is selected by default.
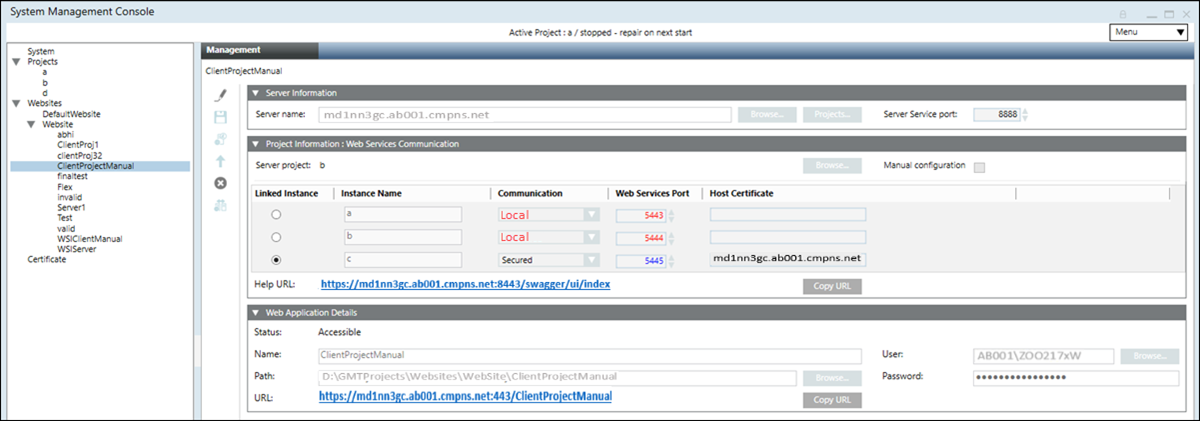
- Click Create Web Application .
- The details in the Web Application Details expander display with pre-populated information for some fields. By default, the values for the Certificate issued to, User, and Password fields display the same information that was configured for the parent web site. The Communication and the CCom port fields are pre-filled as per the selected server project. The Certificate issued to field displays by default the same self-signed certificate that was configured during web site creation It is used for signing the Web application. In addition, enter values in the following fields:
- Service port matching the Service port on the server,
- Server name by browsing and selecting the server using the Workstation Picker dialog box.
The server name provided must match the subject name of the CCom host certificate configured on the server.
- Server project name by clicking Projects
- Shared project path
- Web application Name
- Click Save .
- A confirmation message displays.
- Click Yes.
- The web application URLs (https and http) are created.
- Click the web application URL and install the web application certificates.
NOTE: You can also access the URL from any other machine (without securing the web communication) and work with Windows App client.
- Launch the Windows App client and work with it.
")
If you want to select and link a project on the Server to a different WSI instance, you must edit and save the web services application.
- At least one web services application is available.
- In the SMC tree, select Websites > [Website] > [web services application].
- Click Edit .
- The Server Information expander displays the current Server name.
- In the Project Information: Web Services Communication expander, edit the details as follows:
a. Select a project name for linking to the web services application.
NOTE: When you select a different project, the WSI instances for that particular selected project are displayed.
b. In the Linked Instance field, select an option adjacent to the WSI instance that you want to link to the project.
- From the Web Application Details expander, edit the details as follows:
a. Click Browse to edit the web services application user. The web services application user must be a member of the IIS_IUSRS Group. If you select a user that is not a member of the IIS_IUSRS Group, the SMC prompts you to add that user to the IIS_IUSRS Group.
b. Enter the Password of the web services application user.
- Click Save .
- The web services application parameters are modified.
- You have ensured that there is enough disk space for web services application creation, else you must free some disk space. In Additional Installer Procedures, see Use Cleanup to Reduce Data Volume on the Hard Drive.
- The host certificate's subject name configured for the WSI instance settings on a Server project is matching the server name on the Client/FEP.
- The root certificate (.cer file) of the host certificate or the self-signed certificate provided in the Host certificate field, of the selected WSI instance, is available in the Trusted Root Certification Authorities (TRCA) store of the Local machine certificates store on the Server computer as well as on the remote web server (IIS) hosted on Client/FEP computer.
- In the SMC tree, select Websites > [website].
- Click Create Web Services Application .
- In the Project Information: Web Services Communication expander, select the Manual configuration check box.
- The Server project becomes disabled and you cannot browse the server project.
- The Web Services Port becomes available.
- In the Server Information expander, do the following:
- In the Server name field, type the full computer name of the server, for example ABCXY022PC.dom01.company.net, or
- click Browse to locate and select the server using the Workstation Picker dialog box.
- In the Project Information: Web Services Communication expander, do the following:
- Modify the default port under Web Services Port which is set to 8443.
NOTE: The Communication type is always set to Secured (8443) in manual configuration mode.
- In the Web Application Details expander, do the following:
a. Type a unique name for the web services application.
b. Use the default path to store the web services application files [installation drive:]\[installation folder]\[Websites]\[Website name] Otherwise, click Browse to modify the path.
c. Use the default website User or click Browse and select a user using the Select User dialog box. The web services application user must be member of the IIS_IUSRS group.
d. Enter the Password of the selected user.
- Click Save .
- A new web services application node is created as child of the selected website under Websites. A corresponding child node is created in IIS.
- A Copy URL button displays.
If any details must be modified after the web services application is created, edit and save the web services application.
- At least one web services application is available under Websites > [website] in the SMC tree.
- The host certificate's subject name configured for the WSI instance settings on a Server project matches the server name on the Client/FEP. Additionally,
- The root certificate (.cer file) of the host certificate or the self-signed certificate provided in the Host certificate field, of the selected WSI instance, is available in the Trusted Root Certification Authorities (TRCA) store of the Local machine certificates store on the Server computer as well as on the remote web server (IIS) hosted on Client/FEP computer.
- In the SMC tree, select Websites > [website] > [web services application].
- Click Edit .
- In the Server Information expander, do the following:
- Type the full computer name of the server or click Browse to select the server name using the Workstation Picker dialog box.
- (Only in automatic mode) If required, edit the server service port to match the server service port number on the Server. The default port number is 8888.
- (Only in automatic mode) Edit the project from which you want to obtain the information by clicking Projects and selecting a server project using the Project Information dialog box. Outdated projects are not available for selection.
- In the Project Information: Web Services Communication expander, proceed as follows:
- In automatic mode, you can select a server project for linking to the web services application.
- In automatic mode, you can select and link a WSI instance of a Server project to the web services application. The available web services instances for the selected project will be listed. The Communication mode and the web services port are automatically configured according to the Server project selected. If the Communication mode of the selected server project is Local, then the web application, is also created with the Local mode. In this case, you cannot work with the Windows App Client. Therefore, you have to manually edit the Communication mode of the server project to Secured and then Align with Server to update the Communication mode of the web application to Secured.
- (To edit the web application in manual mode) Select the Manual configuration check box and edit the default port under Web Services Port, for the Secured (8443) communication type to change the default values.
- In the Web Application Details expander, do the following:
a. Click Browse and select a web services application user. The user can be a local Windows user or a domain user.
b. Enter the password for the web services application User.
- Click Save .
- The web services application is modified.
- You have ensured that there is enough disk space for web services application creation, else you must free some disk space. In Additional Installer Procedures, see Use Cleanup to Reduce Data Volume on the Hard Drive.
- At least one website is created and available under Websites in the SMC tree.
- In the SMC tree, select Websites > [website].
- Click Create Web Services Application .
- In the Server Information expander, do the following:
a. Type the full computer name of the Server, for example ABCXY022PC.dom01.company.net
or click Browse and select the server name using the Workstation Picker dialog box.
b. If required, edit the server service port to match the server service port number on the server. The default port number is 8888.
c. Click Projects to browse for and select a project on the configured Server using the Project Information dialog box.
- In the Project Information: Web Services Communication expander, the Server project name is configured according to the selected Server project.
- (Optional and not required when you have selected the server project using Projects) In the Project Information: Web Services Communication expander, click Browse to select a Server project using Project Information dialog box.
- In the Project Information: Web Services Communication expander, the communication type and the Web Services Port are configured according to the Server project selected. If the Communication mode of the selected server project is Local, then the web application, is also created with the Local mode. In this case, you cannot work with the Windows App Client. Therefore, you have to manually edit the Communication mode of the server project to Secured and then Align with Server to update the Communication mode of the web application to Secured.
- The available WSI instances for the selected Server project display.
- In the Web Application Details expander, proceed as follows:
a. Type a unique name for the web services application.
b. Use the default path to store the web services application files [installation drive:]\[installation folder]\[Websites]\[Website name]. Otherwise, click Browse to modify the path.
c. Use the default website user or click Browse to select a user using the Select User dialog box. The web services application user must be a member of the IIS_IUSRS group.
d. Type the password of the selected user.
- Click Save .
- A message displays.
- Click OK.
- A new web services application node is created as child of the selected website under Websites in the SMC tree. A corresponding child node is created in IIS.
- A Copy URL button displays.

NOTE:
With Version 5.0, the Unsecured communication type is replaced with Local. It is recommended to configure the communication of all remote web applications to Secured as Unsecured communication will not work.
Tips
- The host certificate's subject name configured for the WSI instance on a Server project must match the server name on the Client/FEP. Otherwise, a message displays informing you about the inconsistency and you cannot work with Windows App clients.
- The root certificate (.cer file) of the host certificate or the self-signed certificate provided in the Host certificate field, in the Communication Security expander of the selected Server project, is available in the Trusted Root Certification Authorities (TRCA) store of the Local machine certificates store on the Server computer as well as on the Client/FEP machine hosting the web server (IIS).
- If the root certificate is missing on the Server during a web services application creation/editing on remote web server (IIS), a message displays informing you that the host certificate is not valid. However, if the root certificate of the host certificate is not available in TRCA on the Server, but is available in the TRCA on Client or FEP hosting the web server (IIS), the web services application URL works.
- The web services application can be different than the website user. You must ensure that the port of the linked Server project’s WSI instance, is accessible from the remote web server (IIS) hosted on Client or FEP station.
- A CNG certificate with ECDSA signature algorithm is not supported.